Altitude Training Rooms – The Evolution

Altitude training, once the secret weapon of elite athletes, has evolved dramatically over the years. The concept of training in reduced oxygen environments to enhance performance has a rich history dating back to the mid-20th century. Today, altitude training rooms, often referred to as hypoxic chambers, have become accessible to a wider range of athletes and fitness enthusiasts. In this blog post, we will explore the evolution of altitude training rooms and how they have revolutionized the way athletes prepare for peak performance.


The Early Days of Altitude Training:

The history of altitude training can be traced back to the 1940s when it was first used as a method to improve athletic performance. Initially, athletes had to travel to high-altitude locations to benefit from the reduced oxygen environment. These high-altitude camps were remote and often inconvenient, making altitude training accessible only to a select few.


The Emergence of Hypoxic Chambers:

The next major development in altitude training was the creation of hypoxic chambers or altitude training rooms. These rooms, equipped with specialized equipment, allow individuals to simulate high-altitude conditions without leaving the comfort of their training facilities. This marked a significant shift, making altitude training more convenient and accessible.

altitude training toronto

Altitude Training Rooms Today:

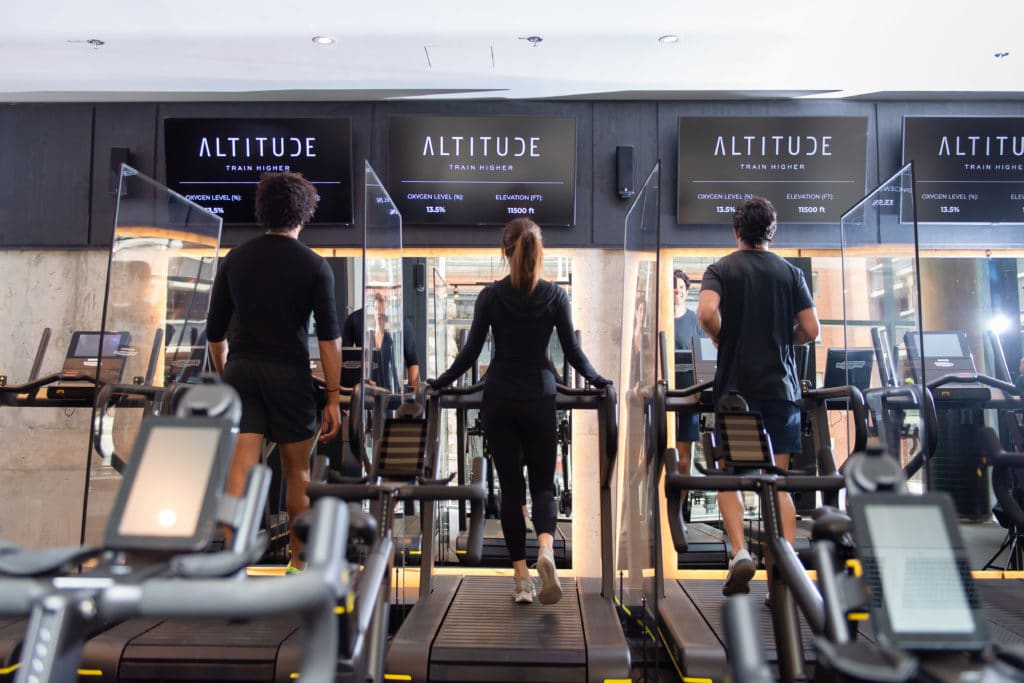
Modern altitude training rooms have come a long way from their early iterations. They are now equipped with advanced technology that allows for precise control of oxygen levels, temperature, and humidity. Athletes and fitness enthusiasts can customize their altitude training experience to suit their specific goals and training regimens.


Benefits of Altitude Training Rooms:

  1. Enhanced Endurance: Training in reduced oxygen environments helps the body adapt by increasing red blood cell production, leading to improved oxygen-carrying capacity and enhanced endurance.
  2. Faster Recovery: Altitude training can accelerate the recovery process, allowing athletes to train harder and more frequently.
  3. Increased Stamina: Athletes can build greater stamina, vital for endurance sports, by incorporating altitude training into their routines.
  4. Mental Toughness: Altitude training not only enhances physical capabilities but also strengthens mental resilience, a key component of success in sports.
  5. Accessible to All: With the availability of altitude training rooms, this powerful training method is no longer limited to elite athletes and is accessible to individuals of all fitness levels.

 Conclusion:

The evolution of altitude training rooms, from the early days of high-altitude camps to the advanced hypoxic chambers of today, has revolutionized the way athletes prepare for peak performance. These rooms offer a controlled and convenient environment for athletes and fitness enthusiasts to harness the benefits of altitude training. As technology continues to advance, we can expect even more precise and effective altitude training methods in the future. This technology will help individuals push their physical and mental boundaries to achieve their fitness and performance goals.

Running a half marathon (in lockdown!)

Over the past year, lockdown has made it very tough to keep up a fitness routine that not only keeps you strong and healthy but is also challenging, fulfilling and fun. As someone whose fitness routine revolved mostly around tough conditioning sessions in the gym, kickboxing, bouldering and the occasional indoor spinning class, I was certainly thrown through a loop in March 2020 when these activities were essentially no longer available to me!


Post-run high!

An early saver for me personally was a half-marathon that I had signed up for a few months previously (before lockdown). My boyfriend and I had signed up to run the Wimbledon Half Marathon that May. It would be my first ever proper running race while he had run a full marathon the previous year in Edinburgh. I was very excited, but also quite nervous about training for a long distance event. The training I was used to was based more on short, intense bursts of power like those used in Muay Thai or plyometrics, as opposed to longer, sustained cardiovascular training that required more endurance. In fact, I think the longest I had run up till then was about 10 km! However, I was certainly up for the challenge and we began planning a full 6-week training plan leading up to the half-marathon. I spent a lot of time considering how I would balance half marathon training with my already jam-packed, gym-based fitness routine. 


Unfortunately, 2020 had very different plans and not only was it looking like the half marathon would likely be cancelled, but we ended up in separate countries as I spent early lockdown back home in Ontario and he remained with his family in the UK. We decided for the sake of it to just follow the training plan anyway, in case by some chance we might still be able to meet again in May and run the race. Those training runs which started short (2-5 km) and then ramped up (10+ km) became such key parts of my early lockdown. It was a chance to get outdoors and most importantly, it was an opportunity for some consistency in a time that was otherwise incredibly unpredictable and uncertain! I tried to go into it with no expectations and I enjoyed feeling stronger with each run and more able to handle the longer distances. I loved listening to music during the runs, exploring my neighbourhood and feeling a tiny bit like I was achieving something together with my boyfriend even though he was so far away and I wasn’t sure when I’d see him again.


Eventually, May rolled around and we were both still very much in separate countries and the race was now very much cancelled. However, we were both well trained at this point and decided to just run the half marathon anyway. And so we picked a day to do it and set off simultaneously – me in the morning in (a very sunny!) Oakville and him in the afternoon in (a very windy!) Essex, 5 hours difference between us. We actually called each other a few times during the race to check in and my sister even joined (with no training at all – she’s quite the runner!). I ended up running the race in just under 2 hours with a time of 1:53:20 and an average pace of 5:22 min/km – not bad for someone who’s more into sprints and burpees!


I tried some of Endurance Tap’s maple-based energy gels during the run for a boost!

Map My Run

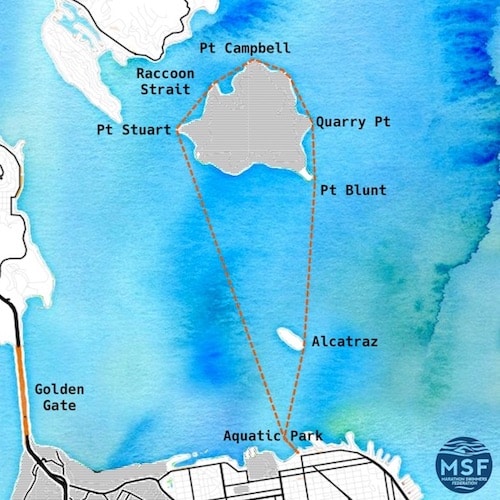
The race through Oakville, tracked on Map My Run!

The half-marathon was a highlight for me in a year that was tough both on the fitness side of things and just in general. One thing I’d say I learnt from it was the benefit of setting yourself challenging but achievable goals and trying to achieve something new. Even though we didn’t get a chance to experience that revved up ‘atmosphere’ so typical of race events, it was almost more special to me in that it was such a personal experience that I got to share with someone I was separated from and that we managed to stick to it in such a bizarre and difficult time. 


If you’re away from someone you love right now and want to try and achieve something fitness related (or anything really – doesn’t have to be fitness based!) a race that you both train for together is a good option!

About the Author


Jessica is based out of London, UK and consults early stage businesses on how to raise investment for their companies. She is an avid fitness enthusiast and loves kickboxing, plyometrics, weight training and calisthenics.

Training For Your First Triathlon: 5 Tips For Success

Training for your first triathlon can be an intimidating experience. From seemingly endless amounts of gear to scarily fast transitions, there can be a lot to wrap your head around leading up to the day. Here are some tips and tricks that will help you feel ready when it’s time to race.

Tip 1: KNOW THE COURSE:

Register for a race close to home, so that you can visit the course before your race to check it out. Take note of the current and terrain; have a sense of how hilly the bike and run will be. Have a sense of what the weather will be like around race day so that you can properly prepare for the appropriate conditions. Prepare at least 12 weeks before your race to give yourself ample time to get ready both mentally and physically.

Try practicing specific course sections you may find tricky; this could be a sharp U-turn on the bike, an uphill climb you are nervous about, or running through a transition zone so you don’t get lost or forget something. After all, transition time counts too and while we’ve all ran with that bike helmet on, it may be easier without!

Tip 2: KNOW YOUR GEAR:

You may feel pressured to have a lot of equipment from your online research or local triathlon group. The most important thing is to be comfortable and able to work with the equipment you have. Run through your gear the night before race day to avoid forgetting anything essential! Here are a few things you do need:

Shoes: Do NOT break in new shoes the day of the race. We often recommend getting running shoes that fit to your gait & tread pattern but go with what you’ve trained in and are most comfortable with. If you have cycling shoes and clipless pedals, be sure to be comfortable with clipping in and out.

Race Kit: You don’t NEED a tri suit for your first race, especially if it is a short course. Swimming in a swimsuit and quickly throwing on shorts and a t-shirt for the other two disciplines will work; I’ve done it and have even thrown on a hoodie for a rather windy bike ride. If you’re lucky enough to have a tri suit for your first race, do a training session or two with it before race day to avoid any surprises. All of these options including your wetsuit (if the race calls for one) can be sleeved or sleeveless. Don’t forget an extra layer if the forecast looks a bit cold.

Wetsuit: To prevent chaffing and to help with removing your wetsuit in the transition zone use petroleum jelly or Vaseline around key connection points like the neck, ankles, and wrists!

Bike: While there is technical assistance on each race, you should feel comfortable with basic maintenance (eg. fixing a flat). Bring a spare tube and CO2 or a small pump in the trusty bike bag. Be comfortable on the bike you are riding, and double check that the gears shift well the night before your race. Give it a test run if you are renting a road bike for your first race. Pump up your tires the morning of to avoid the awful, sluggish ride I endured on my first triathlon. Don’t forget your helmet, sunglasses, and a water bottle!

Looking for some great athletic wear? Check out Alba Athletic. Their gear is designed in Canada and sustainably made to order. (www.albaathletic.com and https://www.instagram.com/albaathletic/)

Tip 3: KNOW YOURSELF:

Your first triathlon is not a race to win: Triathlons are a test of mental endurance. Don’t forget this as you start training for your first triathlon. There are two common issues: struggling with a section too often or exhaustion from trying to keep up with someone else. A 5x Iron man once said: “Understand if the swim if your hardest leg; it is also the shortest a mere 20-40min of the +3hrs often spent on a course.

The bike is your time sitting, eating, drinking and drying off before you set out on a nice scenic run. Some people will beat you in the water but understand they won’t be as comfortable in their splits on land.” For training: BRICK workouts! Try riding your bike the length of the course, and then immediately going for a run. Time yourself and your split times of each kilometer to understand how you feel & where you can improve on your own time. You will encounter a jelly leg feeling and it’s better to encounter this in training than on race day.   triathlon training

TIP 4: START SHORT

While IRONMANs seem exciting to watch and read about, they are extremely taxing on the mind, body, and wallet. Starting with a sprint triathlon allows you to get the jist of a (potentially chaotic) open water swim start, learn how to navigate transition zones, while being able to make some forgiving mistakes. Avoid a race long enough that requires you to worry about fuel (besides a bottle of water on the bike) during your triathlon, as that is a whole other discipline in itself.

TIP 5: LEARN FROM OTHER ATHLETES

Finding a group to train with can boost confidence (and speed). A seasoned athlete can easily tell you what to look out for, and can give simple but important tips on your posture/form to help you be a little more aerodynamic. Plus, it’s always nice to have someone there for you on those bad weather training days to keep you motivated!


Author: Carina Chung

PNOE Metabolic Testing – Eliminate the Guesswork

Altitude uses PNOE Metabolic Testing to provide a complete picture of your cardiovascular and metabolic function. The accuracy of the test results allows Altitude coaches to determine precise health and fitness metrics like VO2 Max and Resting Metabolic Rate. These metrics serve as a foundation for coaches to create workout and nutrition plans that can help you achieve your goals.

  1. What is Metabolic Testing?

Metabolic tests measure the rate at which your body burns calories and uses oxygen during rest or during different activities. Some of the data from these tests includes:

  • Resting Metabolic Rate – the number of calories your body burns at rest.
  • Metabolic Efficiency – the number of calories your body burns during exercise.
  • VO2 Max – the max amount of oxygen your body can use during exercise.

2. Why do I care about Metabolic Testing?

Understanding these values helps guide specific and individualized nutrition recommendations to help you fuel your body for training and peak performance, as well as for reaching your health and body composition goals.

3.    Who will benefit from PNOE Metabolic Testing?

  • Endurance Athletes (Runners, Cyclists, Triathletes, etc.)
  • Power-based Athletes (Basketball, Crossfit, etc.)
  • Hikers, Climbers and Mountaineers
  • General Health and Fitness (Weight loss, aerobic training, etc.)

4.   What do the pros think?


Interested in learning more? Send us an email at info@altitudeathletictraining.com.

View our other A La Carte Assessments here. 

Book your PNOE VO2 Max test at Altitude:

Pico da Ibituruna – An Adventure Spot in Brazil You Should Check Out

Outdoor sports and adventure travel fans all know about the popular go-to destinations. Mountain biking? Head to the Alps. Trekking? Try New Zealand or the Inca Trail in Peru. Rock Climbing? The national parks of the US never let us down.

One place you may not have heard of for adventure sports is in the mountainous state of Minas Gerais in southeastern Brazil. Pico da Ibituruna is a national park and mountain that can be found on the banks of the Doce River and hovers over the city of Governador Valadares.

The adventure sport options you’ll find there are numerous – from hiking and mountain biking, to climbing, abseiling and gliding. And the stunning green landscape is a great backdrop as you get your adrenaline rush.

To get to the beautiful views though, you need to first overcome the 17 km climb. And with a summit rising 1123 meters above sea level, the climb up Pico da Ibituruna – Pico – is a reasonably challenging one. Let’s look at what makes that climb worth-it:

1) Free Flight:

Pico da Ibituruna is one of the best places to practice free flight. Thousands of enthusiasts come here from all over the world, dotting the sky with the colours of hang gliders and paragliders. The site has a free-access flight ramp, but does not offer instructors or equipment. So, if you are going to Pico with the intention of flying, you need to go with your own equipment, with an instructor or look for companies that offer this service in Governador Valadares.

2) Hiking:

Apart from the climb up to the summit, which is a couple hours’ hike along a marked trail, you can also get your hiking fix at Vale Silvestre. This is an ecological park found on the return from Pico that offers trails for all-levels. There’s even activities such as kayaking available there if you want to keep your heart rate up and try something a little bit different!

3) Climbing and Abseiling:

Pico also offers some of the best climbing and abseiling in Brazil. The best known trails are Via do Ralf and Via do Catão, both about 400 meters high. To get down, the most popular trails are Rapel da Santa and Rapel do Mirante.

4) Zipline:

Looking for another way down the mountain? Try ziplining. This options offers quite the adrenaline rush and one one of the most incredible ways to enjoy the landscape, second only to free flight.

5) Mountain Biking:

You can also boost your adrenaline (and your quad muscles) on the numerous mountain bike trails. The mountain descent from Pico da Ibituruna is one of the most challenging in Brazil, so remember to be very careful!

At Altitude Athletic Training, we can help you prepare for your next active travel adventure. Read more about Altitude for hiking, climbing and mountaineering here.

Bike Buying – How to Choose the Right Bike for You

Buying a new bike can be like welcoming a new family member into the home. It will need a place to stay (preferably inside where it’s warm and clean), it will need maintenance, cleaning and upkeep, and it will continue to cost you money for years to come in exchange for hours of joy, happiness, frustration, and anger. Nonetheless, cycling has become more and more popular over the last decade – Business Insider even wrote an article on the newly-coined phrase, “Cycling is the new golf”.


There are a few things to consider before you shell out several thousand dollars on your new toy. Read on for what to think about before pulling the trigger.


1. What are you hoping to use it for?


If multisport is your primary goal (duathlon and triathlon), then you might be thinking of going the direction of an aero triathlon or time-trial bike. These machines are built for speed over anything else, but they can have some drawbacks. Aero frames are often less efficient in climbing hills, and so if your A-race is on a hilly course, you may be wiser to stick to a lightweight road bike that is easier to climb with. Many road bikes are actually lighter than tri bikes, whereas the actual wind tunnel-tested aerodynamics of tri bikes are better than road bikes. Another idea to keep in mind is that you can always purchase a pair of clip-on tri bars for your road bike to temporarily convert it into a tri-bike where you can settle into an aero position for long periods of time. It’s also good to keep in mind that most cycling clubs don’t accept tri bikes during group rides because the aero position decreases the rider’s ability to control the bike well in a group scenario.


If your primary goal is to hit the roads and solid surfaces and be able to get outside, a road bike is likely the perfect fit for you. Under the road bike umbrella, there are several options to choose from. Road bikes intended for speed and racing are typically a little lighter weight and will have more carbon components (read: more $$$), and are generally stiffer with higher road feel, kind of like a pair of racing flats for runners. They are designed to be responsive and ultimately to be fast. The frames are built more aggressively with lower front ends and handlebars, meaning they aren’t quite as comfortable for the long ride.


Road bikes that are designed for the more casual rider or someone looking to go longer but not necessarily as fast as possible are considered endurance road bikes. Contrary to the lightweight, speedy road bikes, these bikes are built with more flexible frames, generous fits, and less aggressive gearing to allow for greater comfort over longer time. Many beginner riders find these bikes fit the bill perfectly. They also tend to come in a little on the less expensive side since the components aren’t geared to be as light as possible.


2. What type of surfaces are you looking to ride on?


If you’re hoping to hit some dirt roads but not exactly an intense forest trail, a gravel bike may be just what you’re looking for. Gravel bikes are newer players in the bike world, and have become a fantastic choice for both experienced and beginner riders as they offer wider tires, greater stability, and more riding flexibility than traditional road bikes. If you’re looking to get into the up-and-coming sport of cyclocross, this is what you’ll need!


Not quite a road bike and not quite a mountain bike, these bikes are of course heavier than racing bikes, but will give you the flexibility to ride on virtually all types of surfaces. They are fantastic for more social rides, where speed is less a concern and all-day riding is the name of the game. Frames can come in different materials offering heavier or lighter rides, but as with all bikes, it’s up to you what you want to shell out.


If you’re really hoping to go all-in with nature, your best bet would be a full-blown mountain bike. These bikes offer the thickest, most textured tires with the most stability, with frames equipped with shocks and components to absorb high amounts of force from bumps and jumps. These bikes are not terribly practical for much else other than the woods and tend to not make great commuters either as they are quite bulky.


3. What’s your budget?


This is a very important question to ask, as you can spend anywhere from $800 for an aluminum frame bike to thousands and thousands of dollars on a custom-made bike with all of the high-end fixin’s. In general, the lighter the bike, the greater the price. Keep in mind there are many “middle of the road” options that utilize a combination of materials such as an aluminum frame but with a carbon fork. We suggest that if this is your first bike purchase, look for something decent and not too heavy, but don’t break the bank. You can consider buying a bike used, but it’s crucial that the frame size is correct for you, otherwise even the best used bike will feel horrible to your body if it isn’t fit properly. Don’t just “try to make it work” – this is a one-way ticket to getting injured. Finally, invest in a proper bike fit. Most shops will offer you a “complimentary fit” with the purchase of your bike, but these are rarely more than a crude fitting where they ensure the seat is the right height. A truly well-done bike fit takes 2-3 hours and will run you $200-$600 dollars – worth every cent in our opinion. Most bike fitters stand behind their fit for at least one year, so if you start to develop an ache or pain that doesn’t feel good, you can go back and have an adjustment made.


With the right bike, for the right price, you can confidently ride into the future and enjoy every hour that your new toy brings you. Cycling changes many peoples’ lives and you may just find your next favourite sport off of the links.


About the Author 

Lauren Roberts is a Registered Physiotherapist and Founder of The Running Physio in Toronto. For more information on her team, the clinic, and for more great blog articles, visit www.therunningphysio.ca.